Add/Removing Face Vertices
Home - Return to Tutorials
|
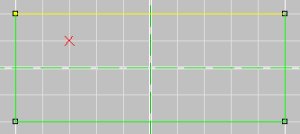
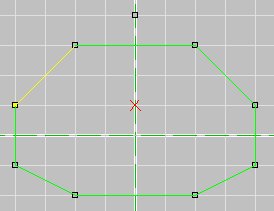
In some cases in D3Editing you have to edit the amount of vertices on a face. This might be because you have a T-Joint or maybe just because you want an extra edge to your face, this is always a handy function to have when you don't feel like re-making the face. To the right is an image with a face, I want to add an extra vertex to this face.
|
|
|
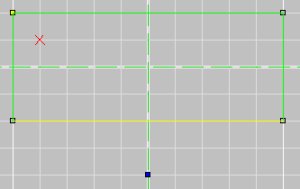
Now, go into vertex mode (Ctrl+R) and insert a vertex, if needed move the vertex to where you want the vertex added in the face. Now select the face you want the vertex added and then select the edge (the yellow line in the outline of the selected face, press 'E' to change between them) of that face the one you want split. Notice on the diagram on the right, I have the face I want selected and the edge that I plan on splitting selected also. Now all I have to do is hit the "Add vert" button ( ). ).
|
|
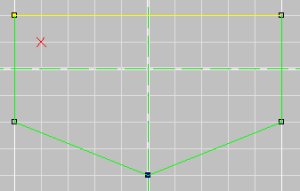
And you're done! Wasn't that simple? Just remember to re-align your texture when you are done or else it will be stretched funny. This function is very handy when trying to remove pesky T-Joints from your level.
|
|
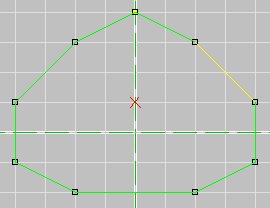
Deleting a vert from a face is almost exactly the same. all you have to do is select the face you want the vert deleted from and select the vert (rotate through verts on your face by pressing "V") you want deleted and hit the "Remove vert" button ( ). ).
|
|
|
It pops up a window making sure you want to remove this vert from this face, if you are positive you did everything right, click 'yes' and the vert will be removed from the face. Remember to re-align the texture. The vert itself will still remain intact in case it is being used by other faces, if you don't want it anymore, simply delete it.
|
Home - Return to Tutorials
|